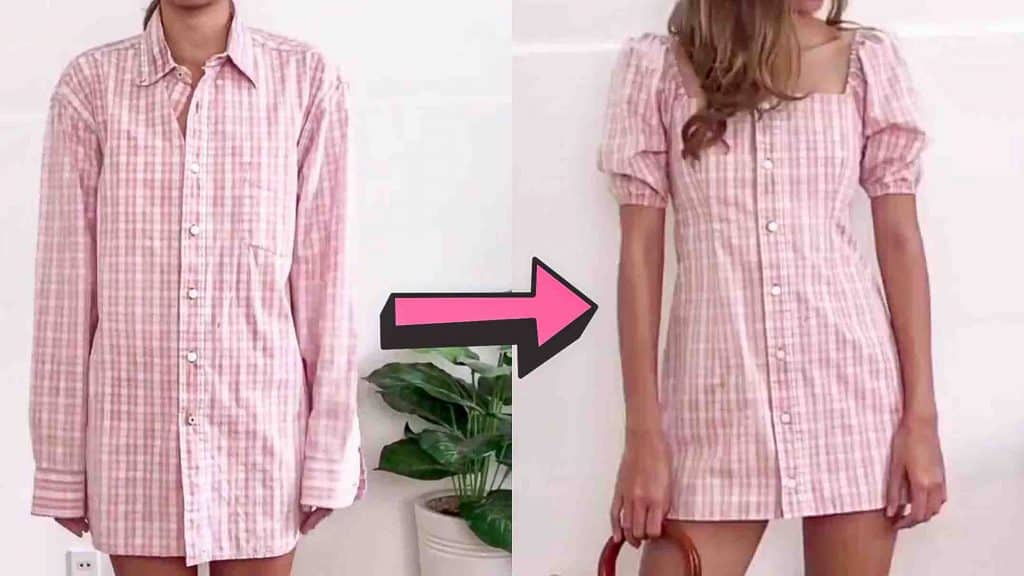
Do you have old long sleeve shirts that you are not using anymore? Instead of keeping them in your closet, why not transform them into this DIY puff sleeve dress from Jess Dang on Youtube. This dress is cute, trendy, and will surely turn heads! Not to mention, the tutorial is beginner-friendly and very easy to follow. Watch the video tutorial below to learn.
Materials:
- old long sleeve shirt (preferably oversized)
- scissors
- measuring tape
- fabric marker
- pins
- elastic band
- safety pins
Directions:
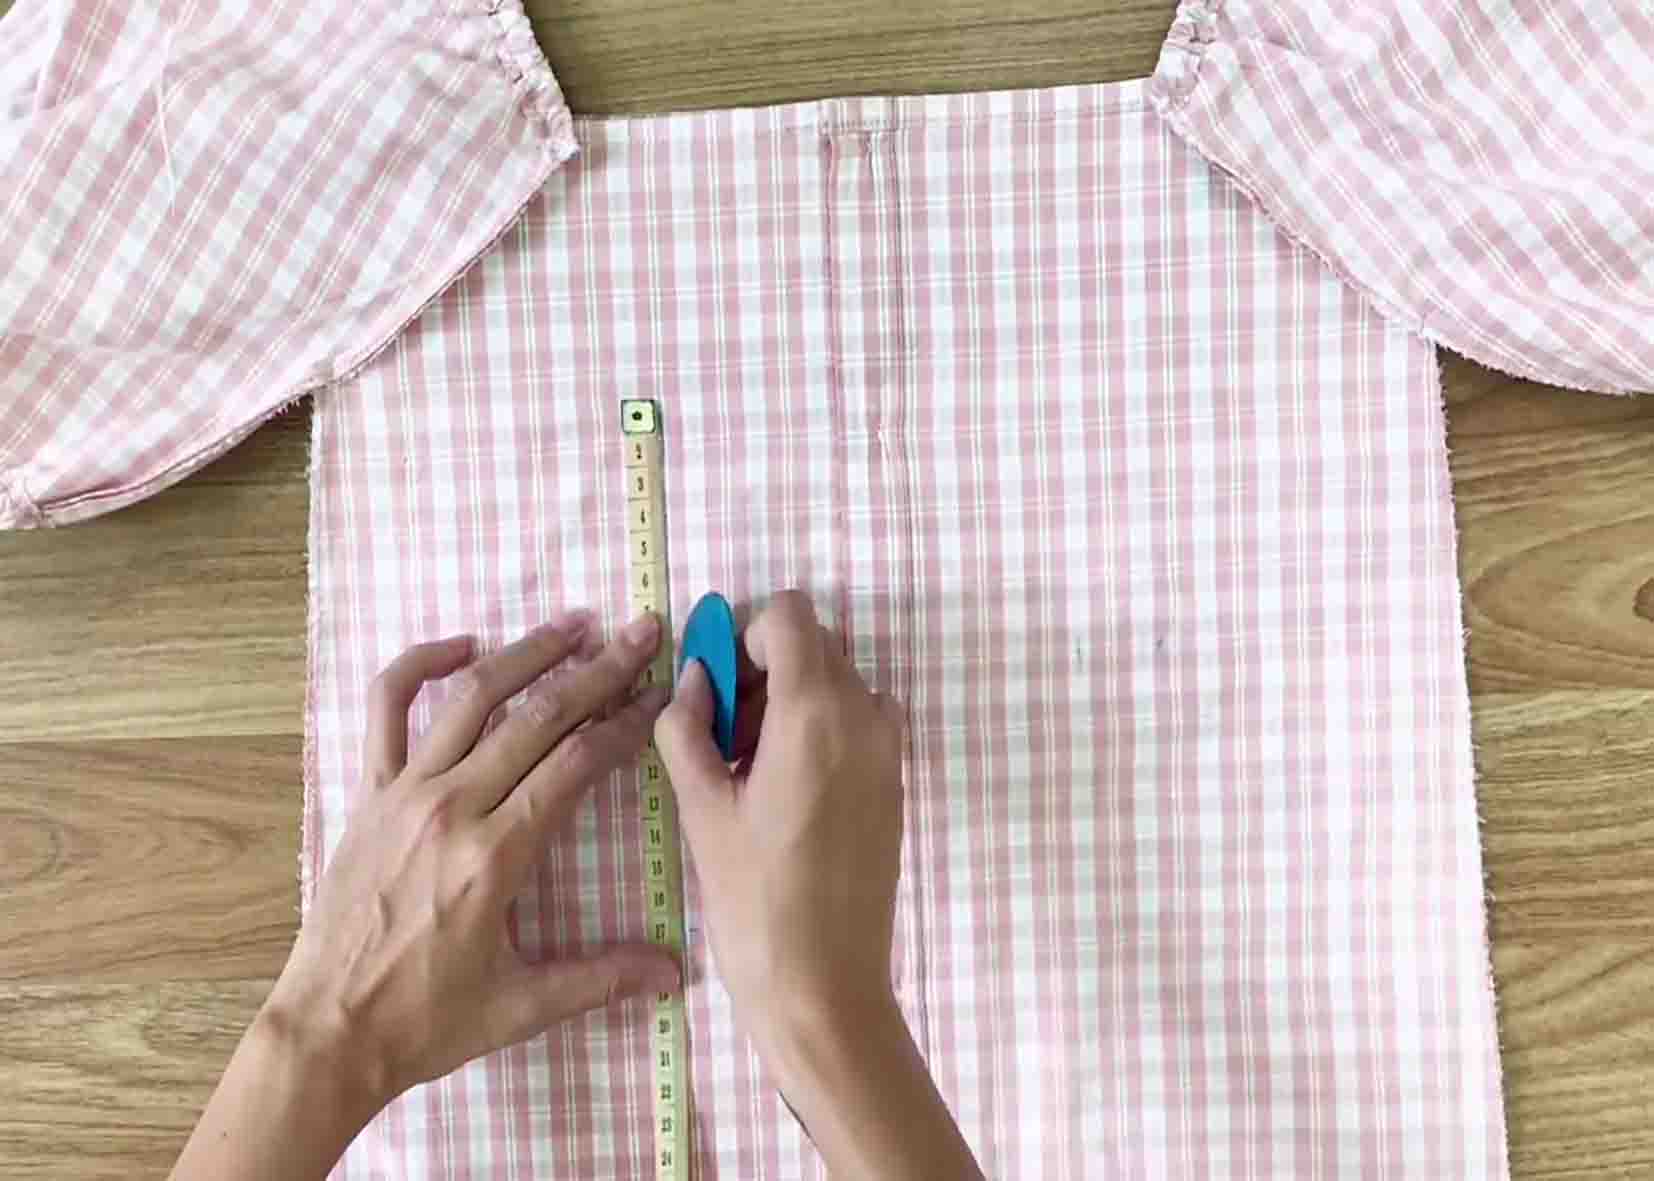
Step 1
Cut the two sleeves (just before the seams) of the long sleeve shirt. Remove the front pocket. (If the shirt has one.) next, draw a horizontal line at the top (below the collar) from end to end. From the first button on top, measure a 13 cm line and put a mark there. Do the same to the other side. From the first mark, measure a 5 cm vertical line down, then put a mark. Do the same on the other side. Back to the first 5 cm mark, measure a 9 cm horizontally going outward. Do the same again on the other side. Connect the last mark (9 cm) and the first mark (13 cm), you should end up with a diagonal line. From the last mark again (9 cm), draw a vertical line up to the end of the shirt. Do the same on the other side. The length of this line is 55 cm. This will be the official length of the dress. (The dress length depends on the shirt you are working on.) From the 55 cm mark on the bottom part of the shirt, measure 5 cm on each side going outward and mark there. From the 9 cm mark on the top, connect it to the 5 cm mark at the bottom of the shirt. After this, cut the drawn lines on the shirt and you will have the front and back of the body of the dress. Next, fold twice at the top and secure with pins but make sure not to hide the buttonhole. Do the same on the back fabric of the body, then overcast them on the sewing machine.

[social_warfare]
Step 2
Moving now to the puff sleeves of the dress. Get the cutout sleeve and measure 38 cm from the cutout edge, then mark it. From that mark, draw a vertical line up to the end, then cut that line. Next, cut open the sleeve and remove the seam part. Do the same process to the other sleeve. Overcast both the sleeves to the sewing machine. Measure a 1 & 1/5 cm width to the top wide edge part of the sleeve, this is where the elastic will be placed. Secure by pins, then sew. Attach a safety pin to the other end of the elastic band and carry it through the fabric hole. Sew both ends of the elastic band to the fabric. Do the same process to the other sleeve. After this, attach both sleeves to the body of the dress, secure the placement with safety pins first, then sew them. (The part with the elastic should be on top.) After sewing the sleeves, flip the dress inside out and use pins to fix the placement of the front and back parts of the body. After securing it with pins, sew it. Go back to the sleeves and put elastic on the bottom part by doing the same procedure from the elastic on top. (Remember to leave a small gap for the elastic.) After placing the elastic inside, sew both ends together, then sew to close the gap.
Step 3
Moving to the end of the dress. Fold the edge twice then overcast it to the sewing machine. Wear the dress and put pins to the bust area to hold your measurements. Do the same to the back of the dress. Mark each side with pins (in this case, it was 3 cm) From the center mark, measure 8 cm going up and down. Connect all the markings. Fold it in half, then draw an arc line. (This will be the line to be sewn.) Do the same on the back. Your dress is now finished.
DIY Puff Sleeve Dress From An Old Shirt