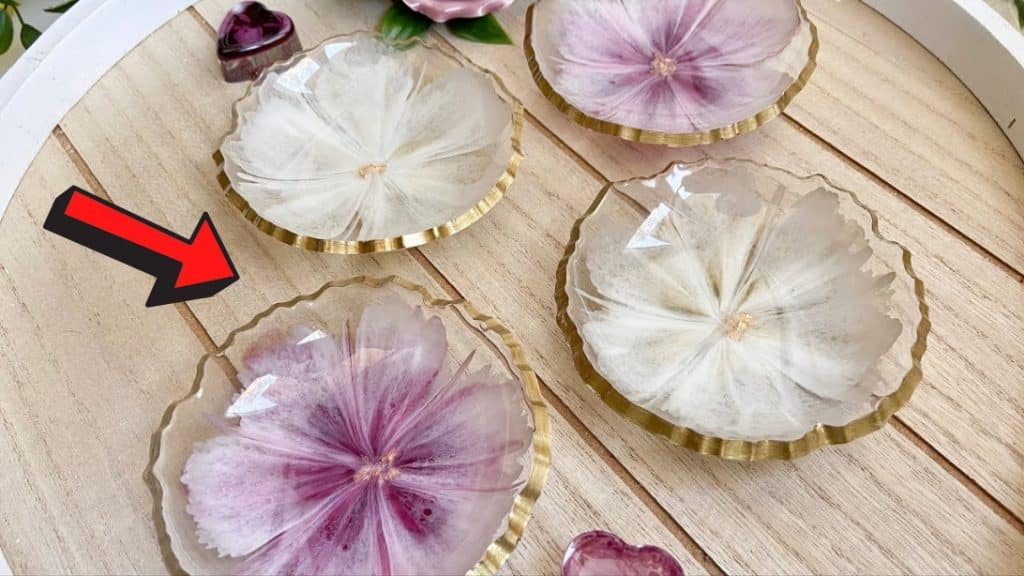
Want to learn how to make these 3D flower resin trinket bowls? Here’s a tutorial by Summer Girl Designs on Youtube. You can use whatever color you like and customize the petals of each flower! Watch the video below for detailed steps.
Materials:
- resin
- resin mold
- white, bright gold, red violet pigment paste
- torch
- stick
- gold flakes
- bowls
[social_warfare buttons=”facebook,pinterest,twitter,whatsapp”]
Instructions:
Step 1:
Mix parts A and B resin in a container for a few minutes until there are no more streaks and it’s clear.
Step 2:
Pour clear resin into 4 molds. Use a wooden stick to push it to the edges of the molds.
Step 3:
Mix the white pigment in a container then add a small amount of resin. Do the same for the gold and red-violet in different containers.
Step 4:
Use a torch gun to pop any air bubbles. Make sure you’re moving the torch gun very quickly so that you don’t burn your resin or silicone molds.
Step 5:
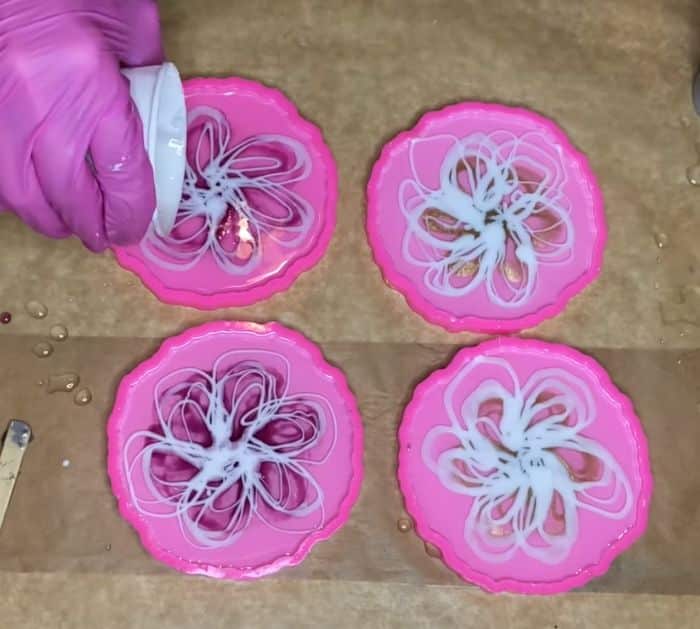
Start with the red-violet resin. Gently pour it into the shape of flower petals on the two molds then use the gold resin for the remaining two. Do it two to three times.
Step 6:
Next, gently pour the white resin into the shape of a flower four times on each mold. You can add more layers if you want.
Step 7:
Use a wooden stick to drag through the resin from the edge into the center in between each flower.
Step 8:
Take golden flakes using the stick and add them to the center. Use the torch to remove air bubbles.
Step 9:
Let them dry for 8 hours. If you de-mold them late, they will be difficult to form.
Step 10:
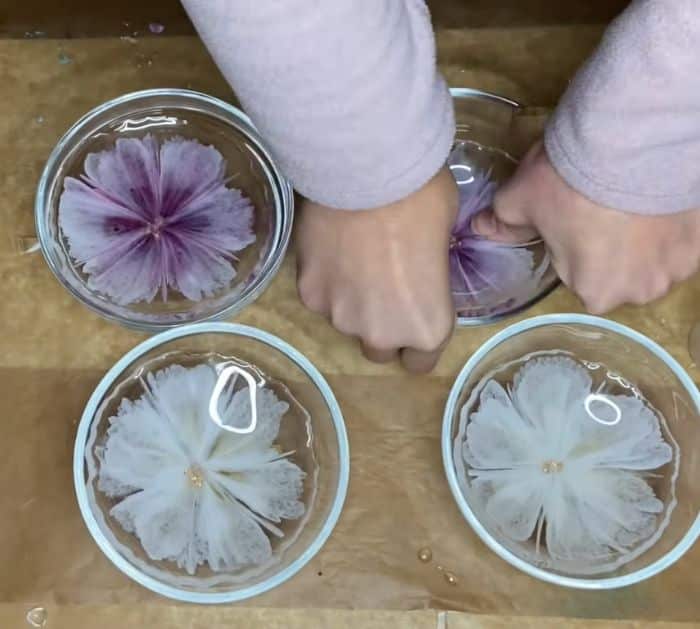
Cover the bowls with plastic wrap. Demold each piece, place them on the bottom of the bowls, and press them down. Allow them to sit for a few days.
Step 11:
Remove the resin from each bowl, then color the edges using a gold marker.

