DIY Yarn Reindeer Christmas Decor Idea

Image Credit: NataliDoma DIY on YouTube
This personalized DIY Christmas decoration is a must-try because it’s cheap and easy. You can use it as décor to your home or give it as a gift. You can also make your version of these and personalize the design. Don’t worry about doing it wrong and be at ease because this tutorial is made easy for you to follow. Besides, there’s no real right or wrong way of making these because you can always make it to your preference. Make sure to add this to your DIY project list or if you don’t have one, then this should be your first! Have fun making this clever craft brought to us by NataliDoma DIY on YouTube.
Materials:
- Brown yarn
- Black yarn
- Red felt sheet/cloth
- Brown felt sheet/cloth
- 2 small black beads
- 1 small red bead
- Small bell
- A pair of scissors
- Needle and thread
- Wire
Directions:
Step 1
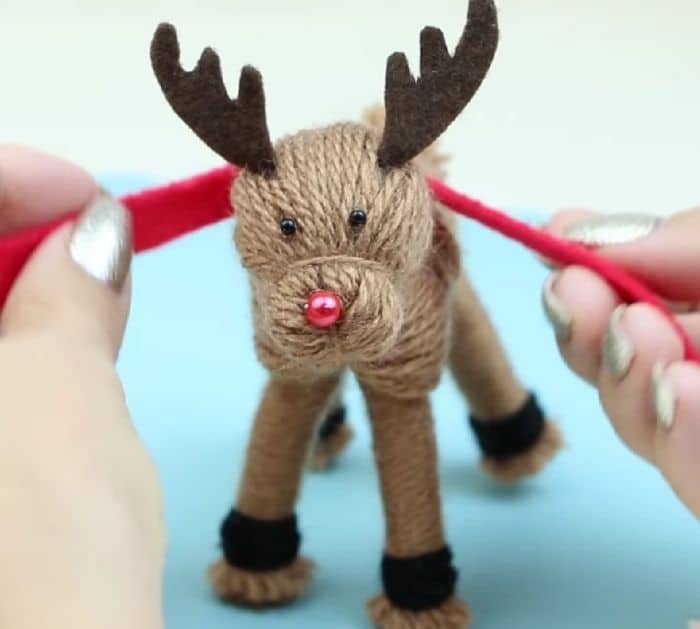
Make 2 rolls of brown yarn in a thick book, the other should have 80 rolls and the other one 100. Find the center top of each roll and tie it with a string then cut each end. Take the 100 rolls of yarn and split it in half, insert a wire in between and join by tying it together at the center of the yarn. Bend it and cover the wire, tie the top part about half an inch below, this will be the deer’s nose. Tie another inch below and bend to form the head, continue rolling the yarn just enough to shape a neck.
[social_warfare]
Step 2:
Split the body of the yarn into two and keep the upper half away, now the lower half of the yarn will be split again. These two parts should roll with yarn until it reaches the bottom, only leaving about an inch uncovered with yarn. Take the 80 rolls yarn, cut the bottom, split, and insert a wire in the middle. Wrap the split yarn on the neck of the deer, and secure it by tying it with a yarn. Tie both ends before joining the two-piece together in the middle. Wrap each lower part until the end leaving an inch at the bottom unwrapped. Bend it and this becomes the other set of feet of the deer.

Step 3:
Bend the ends of the wire then cut the excess yarns and shape them into 4 little feet. Take the upper half of the yarn that hasn’t been attached yet, and split it in half before spiraling it over the body of the deer and onto its bottom, tie and secure with yarn then shape it into a small round tail. Sew a red bead for the nose and 2 black beads for the eyes. Draw a pattern of the deer’s antlers in the felt sheet, cut and sew at the top of its head. Wrap a black yarn at the bottom of each foot, and a small red felt sheet at the neck for its scarf. Sew a little bell at the center of the scarf.
*All image credits belong to NataliDoma DIY on YouTube. Check out her channel for other easy do-it-yourself tutorials like this one.


