IXIIIVIIDesigns
Are you wanting a growth chart to record your child’s height? This is a forever keepsake! Growth charts are the rage! My family measured me on the back of my parent’s bathroom door and now someone else lives there and I’m sure it’s been painted over. So, if you need to move, you can take this one with you, rather than leave your memories on the back of a bathroom door or a door facing. I have a friend whose husband actually removed and replaced their door facing to take it with them when they moved!
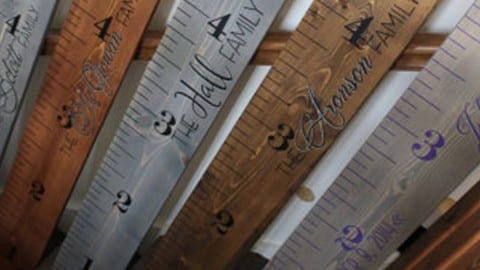
Growth charts leave us with fond memories of our children and also remind us of how quickly they grow up! This is a great decorative piece to have when you’re children are grown and have moved out of the house. It also makes a wonderful shower gift for expecting parents or a gift for the grandparents. As you can see in the photo, these growth charts can be personalized with your child’s name or the family name and designs for decoration! These sure will bring a smile to your child’s face! Super easy…super cute! This is a craft project that is so easy and inexpensive to reproduce if you want to sell them!
Supplies Needed:
Wood
Stain
Pencil
Permanent Marker or Paint Pen
Small ruler
Numbers Enlarged and Printed
1. First, you will need a board. You can use a 6 inch or 8 inch x 6 foot board. These are precut and readily available at Lowe’s, Home Depot, and most home improvement stores.
2. Next, stain or paint your board! Tip: You may choose to do painted and stained stripes on one for a boy’s room.
3. Next, if you’re painting your tick marks and numbers on, you will start measuring your board and marking every inch.
4. Then, she used a black sharpie marker and went over our previously measured tick marks. She did 1″ markings on the “inch” tick marks and a 2″ marking where each “foot” would be marked. You can also use a paint pen or paint and a brush to do these.
5. Next, she printed off some numbers (1-6) on a regular inkjet printer (she used a larger font) and used it as a template for painting on the numbers at each foot.
6. She takes an ink pen and traces the number over top of the paper, pressing firmly to make a light marking in the wood so she knows where to paint.
7. After she painted marks and numbers and let them dry, she took her sander and distressed the whole piece. This is optional!
Watch this step by step easy tutorial!