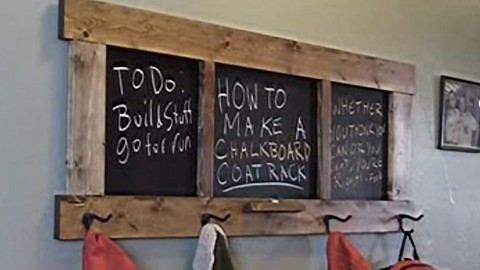
DIY Chalkboard Coat Rack Tutorial

Are you looking for a place where you can write messages to your family (and yourself), where everybody can see them? This chalkboard coat hanger is so very clever! Why didn’t I think of this? I was so tired of writing reminders and losing them before I ever saw them again! This is great because you can hang it in the hallway and see it every time you hang your coat up or walk in and out the door. Can we say fabulous?
The stained frame looks really great with farmhouse decor and if you don’t want to use a stain, another idea is to distress the wood with a paint color….so many different options! Just pick one that goes with your decor and you can even switch out the hooks if you’d like. Make it your own! There are no rules when it comes to creativity!
He uses an orbital sander, a craig jig drill, speed square, table saw (but you can use an orbital saw or old fashion saw), some hearing protection, safety goggles, wood glue, stain or paint, polyeurethane if you’re using stain, coat rack hooks, craig screws, chalk and don’t forget the measuring tape and a pencil
The chalkboard measures 48″ measures and he measures and cuts the height to 17″, using a straight edge to line it up. He cuts with a table saw (or circular), the 1 x 4’s down to size for the frame of the chalk board. The two long pieces will be 51″ and two shorter pieces will be 12″. The two separators will be cut out of 1 x 12 boards at 12″ long. Then he cuts a 1″ wide strip, on a table saw, from a scrap of 1 x 4 board, and he puts a 15 degree angle for the chalk holder. Next he uses an orbital sander to quickly sand away any rough edges before assembling to the frame. He flips all the boards upside down for assembly and makes sure the table top is cleaned off for a nice flat surface to work on. Instead of doing a perfect rectangle, he brings the sides in 1″. Then he adjusts the craig jig for 3/4″ stock (thickness of wood) then he adjusts to a 3/4″ line and adjusts the collar on the bit to 3/4″ setting (you can loosen using an Allen Wrench). Then line up flat part to 3/4″ line and tighten. Start by putting craig jig bit into the chuck of your drill and tighten to drill a craig hole. He places the backside of the 1 x 4 against the fence and tightens the craig jig. He drills holes on each side of the back of the 1/4. Watch the step by step video to see how he finishes this up!


